Showing posts with label winter. Show all posts

Sunday, February 15, 2015

It's Time for Winter Blooms....


Hello Everyone!

Hope you had a fabulous. fun filled Valentine's Day!  I found some time this weekend to upcycle a vintage mantel clock. 


I purchased this small clock a while back at one of my favorite antique shops.  Since it didn't work, I dismantled it, and have been using the parts in projects here and there. 

I'm not quite ready for spring yet, so I went for a snowy white and icy blue color combo for my embellishments.  I cut the flowers from white cardstock using my Silver Bullet Professional cutter.  I gave the white peonies just a hint of color, with Frayed Burlap Distress Ink on the edges.  For the flower centers, I painted jingle bells with Picket Fence Distress paint, in keeping with my wintry theme.  The smaller flowers were inked with Tumbled Glass and Broken China Distress inks, as was the seam binding bow. 

 
The leaves were inked with Vintage Paper and Bundled Sage Distress, and then over stamped them with a script stamp and Frayed Burlap Distress.  I thought a mini clock face would be a fun detail on my full sized clock.  I lightly dabbed Tumbled Glass and Frayed Burlap Distress Paint on the Idea-Ology clock face, dried it just a bit with my heat gun, and then wiped most of it off.  I finished off its center, as well as the centers of the little blue flowers with turquoise rhinestones from my stash.  

 
One of my favorite elements is the gesso 6" wide, loosely woven jute. I placed it in the clock frame from the open back.  It was a happy accident that it bows out from the inside, adding dimension that I didn't expect. 


I considered painting the clock case white, but after cleaning it, I realized that it has a terrific
authentic patina that I don't want to ruin.  I also like the contrast between my bright and icy elements and the dark finish.   


I am happy to be playing along again with the current Frilly and Funkie Challenge, Winter Blooms,

and the Lessology Challenge 44 - Tick Tock,  Along with upcycling the clock case, I also used recycled telephone wire to wire the jingle bell centers, and re-used a piece of poster tack to attach my seam binding bow to the clock case.  (I tell you this in case you didn't know it could be reused.  I almost never throw the stuff away!  I keep a wad that looks like chewing gum stuck to my work table at all times, LOL!)


Thursday, January 22, 2015

What I love about Winter....


Hi Everyone!

Thanks for stopping by!

In keeping with my 2015 personal crafting challenge to use up stash and enter more challenges, I have created a multi-layered, multi-component project this week.

 
The current challenge at Frilly and Funkie is the Winter Wishes challenge.  What fun!  As a resident of New England, I find that there is plenty to love about winter.  Snow is my favorite!  I love being cozy inside, and watching it fall.  I love the challenge of driving on snow covered roads in my small town.  I love sledding down my steep driveway.  I even love cleaning the snow off my car!  I made this banner for my  large vintage window to celebrate my love of snow. 


I started my banner by cutting flag shapes from wintry colored papers from my stash.  The blue/green N and W backgrounds are from a Tim Holtz holiday collection, and the icy blue S and O backgrounds were cut from a DCWV paper.  I used white Recollections paper for the letter layers.  I distressed all of the layers with my Tim Holtz Tonic distress tool.  I stamped the S and O layers with a Tim Holtz text stamp and Distress Ink in Weathered Wood, and then over stamped with
"second generation stamping" of Tim Holtz snowflakes in Watering Can Archival.  I embossed the N and O flags with a floral embossing folder, and dry brushed them with Iced Spruce Distress Ink. 

I inked all of the edges with the same colors of Distress Inks, and stitched the layers together with my sewing machine. I printed vintage family photos from my collection, and layered them onto mats of Distress Inked white paper with distressed edges.  I love how wintry the Iced Spruce and Weathered Wood colors are.  I added touches of Antique Linen Distress where needed as well, to add to the vintage look. 

My next step was to cut lots of different snowflakes from white paper with my Silver Bullet Pro cutter.  I chose to leave them white and snowy, adding touches of glitter here and there, and lots of vintage buttons. 

 
I used Distress Inks and Paints in the same three colors to dye seam binding to make vintage bows.  I used gesso applied with my finger to some half round gems and pearls to simulate snowballs.  I love how tiny bits of the original shimmer peek through. 
 
 
Some of the details show nicely in this photo, including the holographic glitter on the snowflakes. 
 
And one more shot of the banner hanging in place:


I opted to use snowy white yarn to hang my banner and to make a bow for the center.  I attached some recent snowflake experiments to the window to add to the snowy effect.  I have never taken a successful photo in this room.  I wish I knew what to do about it. 

I am entering this project in the following challenges:

Frilly and Funkie Winter Wishes

and
 Craft Hoarders Anonymous Choose Your Challenge

I chose to use Ink and Paint, Seam Binding and Yarn, Stamping, Die Cutting and Mixed Media, Distressing Tool and Embossing, and ephemera, buttons, and (altered) bling. 


I wish you all a wonderful week!

Elizabeth


Wednesday, January 7, 2015

A winter wonderland project for a very cold night...


Hello Everyone,

I'm popping in to post a project in between trips to the basement to stoke the fire.  In my neck of the woods, we are in the midst of a cold snap.  The weather peeps are predicting a low of 10 to 15 below zero overnight.  It's totally ok with me if they are wrong about that! 

Here is my latest project.  I dug into my pile of alterable items and my stash of vintage postcards and family photos for this one:

 
My "vase" is a peat pot, covered in gesso.  I pulled some die cut paper doilies out of my scrap box, sprayed them with water and Distress spray, crinkled and uncrinkled them, dried them, and glued them around the peat pot.  I tied on a charm rescued from a broken bracelet with some rustic twine. 

Flowers just didn't seem right for this time of year, so I cut a bouquet of  dimensional
snowflakes and stars with my Silver Bullet electronic cutter, (my favorite crafting tool) and sprinkled on some glitter.

This is one of my favorites from my collection of scanned vintage family photos.  That's my mom and aunt and two of their cousins on a toboggan in front of the family farmhouse.  I just love it, especially the scarves my mother and aunt are wearing on their heads.  My grandmother really knew how to bundle a kid up.  She put the same scarves on my sister and I when we were little.  Probably on my brothers, too, if she could get them to stand still long enough!  I might just have to find a wooly head scarf if I have to go out in the cold tomorrow. 

These two images are winter themed vintage trading card from the late Victorian era.  I have a collection of them that were collected by my many great aunts and uncles.  I scanned these two, edited the color to sepia tones, inked the edges with Brushed Corduroy Distress Ink and added a border of Rock Candy Distress Stickles.  Finally, I mounted them on a background of bright white cardstock.
 
All of the sparkly elements were mounted on white plastic coated wire.  I created my own "frog" by cutting a piece of corrugated cardboard from the Christmas trash(We recycle it, so I didn't have to dig through the trash. Not that I'm above that.  I had to go digging at work today, to find the center of the tape dispenser.  I threw it away with the empty tape core!), rolling it up, and painting it with gesso to blend with the peat pot.  You can see it here, in this view from the top:
 

I discovered the extra long corsage pins while digging in my charms box.  I think their pearly white beads add the perfect finishing touch. 

One of my goals for 2015 is to enter more challenges, so I am linking up to the following challenges:
Frilly and Funkie Anything Goes Challenge,
Lessology's Challenge number 43, Cardboard Central,
and
Try it on Tuesday "My Favorite Things" challenge. 

Thanks for spending some time with me today.  I hope you are cozy, and find time to be crafty!

Elizabeth


Saturday, November 8, 2014

The Twelve Tags of Christmas - Funkie Junkie style - Week Five


Hello again! 

Happy Saturday!  I'm up to week five of the Linda Coughlin's Funkie Junkie 12 Tags of 2014 challenge.  This weeks inspiration was an elegant tag in Silver and Black.  I love the Festive Gent, but couldn't think of a way to incorporate him into my project.  Instead, I took inspiration from the color scheme, script greeting, and snowflakes on Linda's week five inspiration tag.


I filled two of the spaces in my printer's tray this time around.  The top space is a glass slide.  I used Distress Embossing Paste and silver tinsel glitter to add the row of tiny snowflakes and the narrow border.  I backed the piece with black cardstock, and used a piece of scrap foam to raise it up in its space.  

The bottom is a piece of Mirrored, cut to size with my rotary cutter.  I cut the script text from black cardstock with my Silver Bullet Pro electronic die cutter.  I used my Xyron machine to add adhesive, but as usual, lots of unnecessary glue was left behind.  I removed as much as possible, and mounted my Mirrored piece on another piece of waste foam, and hot glued it into place. 

I'm kind of digging this nod to the elegant, sparkly side of the winter holidays.  It makes me think of New Year's Eve. 

Here is Linda's tag:

I think it is absolutely stunning! You can read all about how The Funkie Junkie created this week's tag here: The Silver Embossing Paste (which looks amazing here), dies, and other supplies are available at the Funkie Junkie Boutique, the sponsor of this challenge series.  


I'm loving this tray more and more as the spaces get filled!  So Much Fun!!!!

Thanks for stopping by again!  Have a fabulous weekend!

Elizabeth


Thursday, November 6, 2014

The Twelve Tags of Christmas - Funkie Junkie style - Week Three


Hi Everyone,

I'm back again, with my third project in The Funkie Junkie 12 tags of Christmas challenge.  Follow the link to the instructions for playing along.  While you're visiting Linda's blog, be sure to check out what all of the other participants have been creating.  There is an amazing array of beautiful Christmas goodness!  I've been having as much fun seeing what everyone else is creating as I am making my own pieces.  (I'm too intimidated  to look before I do my tags, so I save them as a special treat after I have posted mine.)

Here is Linda's week 3 inspiration tag.  You can read all about it here:


The large metallic snowflake is what immediately caught my eye.  What can I say, I'm a sucker for snowflakes every time!  They are one of my very favorite winter symbols.  As I said yesterday, this time, I went in a very different direction for my piece.


I wanted to fill one of the smaller square spaces in my printer's tray, so I needed to narrow my focus.  I created my metallic snowflake by cutting four cardstock snowflakes, (with my trusty Silver Bullet Pro digital die cutter, of course) and stacked and glued them.  Any old scrap of cardstock will work, because it all gets covered with foil tape.  I used duct tape from the hardware store (via DH), but really, the foil sheets made specifically for crafting are much shinier than mine. 

The Funkie Junkie Boutique, the sponsor of this challenge, carries Ranger Foil Tape sheets,  as well as the Vintaj Metal Sheets that Linda used in her lovely inspiration piece. 

I adhered my snowflake stack to a piece of cardstock (again, color doesn't matter) that I had cut to size.  I placed my foil tape on top, and started by using my fingers to burnish the foil to bring out the details of the snowflake.  Next I moved on to a knitting needle for the detail work.  If you don't have a knitting needle handy you could use a bone folder.   After much burnishing to bring out the snowflake details, I used the very tip of my knitting needle to add some lines outwardly radiating lines.

Next, I covered the entire piece with Black Soot Distress Paint, dried it slightly with my heat gun, and rubbed some off with a paper towel.  I used my sanding block across the top of the piece to highlight the snowflake.  As a final touch, I adhered flat backed pearls. 

I really enjoyed going off the rails a bit with this project.  I love grungy metallic elements, and this little piece fills that bill.  I do want to go back and use Linda's gorgeous background technique to fill another space in my tray.  Luckily for me, there are 20 spaces to fill!


Here's my tray with the first three projects installed. 

Thanks for visiting!

Elizabeth

Wednesday, November 5, 2014

The Twelve Tags of Christmas - Funkie Junkie style - Week Two


Hi Everyone,

I'm back today with another Funkie Junkie 12 Tags of Christmas inspired project.  I am having a blast with these challenges.  They really have me racing to get to my craft room each night! 

You can find Linda's Week One Inspiration tag and challenge rules here .  To see her gorgeous Week Two tag that I am pretty much CASEing today, click here. 

Here is the piece that I created to fit one space in my printer's tray:


Like the week one piece that I posted yesterday, it is rather tiny, and I relied heavily on my Silver Bullet Pro  digital die cutter to cut my stencils and the flower.  Lots of Distress Ink here, in Pine Bough, Peeled Paint, Brushed Corduroy, Frayed Burlap and Festive Berries.  I used my Ranger Archival Carnation Red by Wendy Vecchi for the very first time.  (Dope slap!  What was I waiting for???) 

The sponsor of this challenge, The Funkie Junkie Boutique,  carries all of the Distress product line, and all of the Wendy Vecchi colors of Archival at a discounted price. 


Here is my printer's tray with my first two projects installed:

You might spy a couple of differences between this photo and the one above.  This one is the original, and I felt it needed a couple of changes, which I made last night, after taking this photo.  I wouldn't be surprised at all if I end up changing it again.  I am still not thrilled with my flower.  Maybe the third try will be the charm?

I finished my week three challenge last night, and I will be posting it soon.  I was able to break away and create something "inspired by" rather than simply casing Linda's gorgeous tags this time. 

Thanks for stopping by to see what I am up to!  Don't pass up a chance to follow the links to the Funkie Junkie Blog and join in on the fun! 

Elizabeth

Saturday, January 25, 2014

So I thought to myself....


"Why not do seven posts this week?"

Hi Everyone!

Yes, I am back with an unprecedented (for me) seventh post of the week.  First up, I am sharing a quick pic of a project that my DD created before she headed back to college. 


The photo doesn't really do these snowflake blooms justice.  They are really gorgeous in real life.  I am more than a little jealous!  At least I got to enjoy them for a few days before they went to school with DD.
 
And as a little gift for DD, to celebrate her first day of classes, I made this:


The files are all from SVG Cuts, except for the tag.  I have used this one piece box from the Christmas Open House kit a few times.  I love how easily it goes together.  I glittered the snowflakes by running them through my Xyron and dipping into a pile of glitter.


 I made one for DD's new roommate as well.  I used my Digital Die Cutter and my pen tool to write their names on the tags.  I love the pen tool! 

Hope everyone is having a terrific weekend so far. 

Elizabeth


Friday, January 24, 2014

Christmas Corner and a Tim tag


Hi Everyone!

Today I have another Christmas card to share:


I tried out a new stamping technique for this card.  I dabbed Distress Stains in various colors directly on my stamp and then stamped onto my paper.  Easy Peasy!  I love the result.  I simply added a text stamp with Archival Ink in coffee, and some Distress ink on the distressed edges.  I finished this card off by adding some Ideology rick- rack trim and mounting it on a card. 
 
 
Here is the inside:


Just some simple layering and a sentiment. 

And now for my version of the Tim Holtz January Tag:

 
  I followed Tim's tutorial, using supplies that I have on hand. 
 
Here is my background:


I used Brushed Pewter Distress Stain as a base, and stenciled a layer of snowflakes with Pumice Stone Distress ink.  I thought my tag needed another layer, so I stamped the blueprint snowflake with Watering Can Archival.  That made me happy.  I stamped my numbers with black Archival.  I sanded them a bit, as I did the "time" text, which is a Remnant Rub. 

For my main focal piece, I used foil and Black Soot Distress Paint.  This photo is from my "attic treasures" collection.  I think these fellows are perfect for a January tag.  They certainly look ready for the Polar Vortex!   I cut a piece of mica to highlight the photo, and attached it to the foil piece with brads. 

I added a type charm and a Philosophy tag to my grosgrain and floss trim.  I used Distress paint to highlight the text on the tag. 

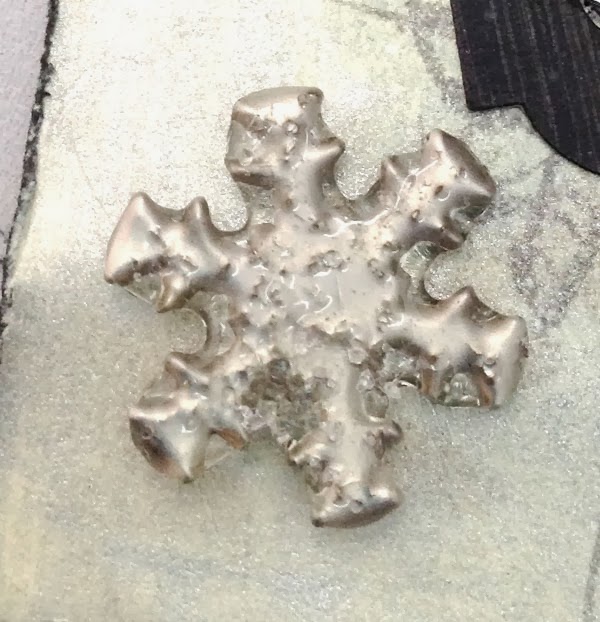
As final detail I added this snowflake brad.  I wanted some extra texture, so I heated it up with my heat gun and dipped it into a pile of UTEE until it was covered to my liking.  When the final layer of UTEE had cooled a bit, I dipped one more time, hoping to attach some un-melted crystals.  I kind of like the results.  It looks like a snowflake embedded in ice. 

I really had a blast making this tag!  Can't wait to see what's up for February. 

Thanks for stopping by to check out my projects today!

Elizabeth

Supplies and Tools used for these projects include:

Distress Stain
Distress Ink
Distress Paint
Archival Ink
Tim Holtz Stamps Blue Print Snowflake and Little Labels
Remnant Rubs
Sizzix Alterations by TH Sunburst Embossing folder
Sizzix Big Kick
Digital Die Cutter
UTEE
Tonic Paper Distresser
Tiny Attacher

Stampendous Christmas Truck stamp


Thursday, January 9, 2014

I fell in love a little!


Happy Day, Everyone!

Today I am sharing yet another easel style card!


 Being the lucky recipient of a Dust Buster for my craft room prompted me to get out some rarely used glitter for this project.


I covered the small snowflake with Ivy Hollow Scrap Fusion adhesive and sprinkled it with Stickles Dry Glitter.  The photo doesn't do it justice, but seriously, it is so pretty that it makes my crafty heart beat a little faster. 
 
 
Not only did DH give me the Dust Buster, he made me the nifty bow tying jig that I used to make this pretty organza bow.  He's a pretty awesome guy!  (Just to be clear, it was the glitter I fell in love with a little.  I love DH LOTS!)
 
 
Happy Crafting,
 
Elizabeth

 Supplies and Tools used for this project include:

Cardstock from my stash
Organza ribbon
Graphics Fairy Vintage image
Distress Ink Antique Paper
ATG Gun & adhesive
Foam mounting squares
Ivy Hollow Scrap Fusion adhesive
Scotch Quick Dry adhesive
My Scrap Chick Easel Cards SVG Collection
Pixel Scrapper feather image (converted to an SVG file)
Digital Die Cutter


Thursday, December 12, 2013

The Twelve Trees of Chrismas Day One....


Happy Day, Everyone!

I have been enjoying lots of Twelve Days of Christmas blog posts over the past few years, and thought it would be fun to join in.  So from now until Christmas Eve, I will be sharing 12  different Christmas trees that I have been crafting over the last few weeks.   I have a mix of paper crafted, recycled, and assemblage tree projects for you.

First up is this paper tree from SVG Cuts. 

I made at least of dozen of these awesome trees, from a witch hat file from the Catacomb Manor set.  As soon as I saw the trailer video, I thought Christmas trees, and laughed when at the end of the assembly video, Mary suggested making Christmas trees.  After finishing my twelve trees, I thought they needed something extra, but I wasn't sure what. 
 
I slept on it for a couple of days, and then came up with this embellishment idea:
 
 
It is a simple spiral of paper, but it sure added the finishing touch I needed for these trees.   As always, I had a blast digging through my Christmas paper collection to make each tree a bit different. 
 
While I can't share the tree file, I am able to share the svg files for the spiral and star elements that I created to embellish my trees.  You can grab them from my Skydrive:  Click here! 
 
These were my choice of handcrafted gift for my mom and mother-in-law,and sister and sisters-in-law this year.  I hope they like them as much as I do. 
 
As always, thanks for stopping by today.  I hope you find time to come back tomorrow for day two of my 12 Trees of Christmas adventure.
 
Elizabeth


Sunday, January 13, 2013

Playoff game or post....


Hi All,

Post won out.  Actually, I am watching the game as well, so everybody wins.  (Right now, my team is winning, so it's ALL good!)  

The card I am going to share today was made using a techniqe taught by Karen Ellis in Creative Jump Start # 9.  Karen did a great instructional video showing something I had never seen done before, mono printing with gel plate.  This looked like so much fun, I couldn't wait to try it.  I did a little searching on-line, and found the re-usable Gelli-plate that she used, available at Dick Blick for $27.00.  Oh boy, that is pretty expensive for something I don't know if I will ever use again.  So I put on my thinking hat, and came up with some alternatives. 

I used a piece of craft foam as my mono print plate.  It was free, which is my favorite price for experiments!  (I have a tray of gelatin in my fridge ready for more experiments.  I'll post any successful results after I find time to try it out.)

I won't give you the steps for mono printing, since I am such a beginner, but I will show you the card I made:


 Here is what I did to create this card:
 
Mono print with two blue acrylic paints and DecoArt pearlizer with two 'over' stencils in white (snowman and dots), added some Distress Inks,  cut out separate snowman stencil, mask it and ink it, ink it with a stencil and add Shapie marker details, attach transparency snowflakes (the leftover pieces of a different stencil) to  the background, pop up the cut out snowman, add sentiment with Ranger Archival in black, cut scalloped edge with Sizzix TH Alterations die, layer it all up with scrap papers from my stash and stick it on a card.  Whew... 
 
It took longer to make than it took to describe, which was really long, (sorry!), and it still looks like it was done by a third grader, but I kind of love it anyway.
 
(I made the stencil for the snowman by shadowing and joining the base layer of a Scrappy Dew snowman file using Make the Cut software.  I love having a new use for all of my really fun Scrappy Dew files! )
 
Thanks for sticking with me for this long.  The next post should be shorter!
 
Elizabeth
 
PS - My Patriots just won the playoff game!  Go Pats!!!!!