Hi Everyone,
I finally figured out how to work around Blogger's photo posting issues with IE9. So, instead of the post I worked on over the weekend, I will just post the photos (Yay!) of what I worked on over the weekend, using the tutorials from Creative Jump Start 2013.
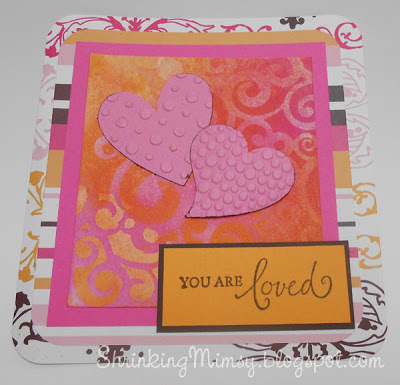
CJS 2 - inspired by Julie Fei-Fan Balzer
For this card, I misted onto cardstock, over a stencil. using a mixture of Distress Reinkers and water in a mini-mister. After it dried, I used my ink blending tool to blend some more Distress Ink over the stenciled cardstock. I added some coordinating heart die cuts, and a stamped sentiment, over layers of solid and printed cardstock. It was fun to break away from tradional seasonal colors and go bright. I really like this technique. It adds great interest and movement to what would otherwise be a clean and simple card.
CJS 3 - Inspired by Heidi Swap
For this card, I used a mask and a stencil simultaneously. I rarely use either of those items, and never thought of using them together. I really like the effect for the background, as well as keeping the mask in place while I stamped the floral images. It took a few tries before I was happy with the results. I ended up cutting a stencil from Bird's Cards. I amazed at how easily I was able to cut the stencil using SCAL software and my electronic cutter. I cut the first one at 8 inches square, and then decided to reduce it to 4 inches, and the detail cut beautifully at this size too!
CJS 5 - Inspired by Sharon Laakkonen
For this tag, I used two ideas from Sharon's tutorial. She used a punch to punch shapes from the bottom edge of a tag, and layered it over a piece of patterned paper. I used my cutter to cut the mittens from the bottom of my tag. Sharon covered another tag with strips of Washi Tape. I used some of the Washi Tape that I made last year ( Click here to see it.) and covered a hat shape that was leftover from a bad attempt at CJS 3. (Love using up my mistakes!) I realize that I need to add some words to this project, but I haven't decided how to do that yet.
CJS 6 - Inspired by Natalie Kalbach
This was a really great technique that involved using a stencil, a foam stamp and some acrylic paints. I didn't have any foam stamps, but it was easy to make one using a basic shape from SCAL, a sheet of foam, a 60 degree blade from Sherri at That's Scrap, and my electronic cutter, which I also purchased from That's Scrap, Inc.. I had never cut foam before, but today was a day for experimentation, and it was really easy as pie. I stuck it to an acrylic stamp block with some tape from my ATG. (The stencil I used is the smaller version of Bird's stencil.)
For the card, I stamped both the background paper and the cut out flowers using Natalie's technique. I layered the cut out flowers with some embossed background papers, and added a little tag with a tiny little sentiment. (It says "Love You", in case you can't see it. I wish I had used a darker ink, but the Distress Mustard Seed really matched the card well.) I layered it up with some matching background papers, and there you have it. A Valentine's card for my older DD.
Whew! Its been a long time since I posted 4 projects at once.
Have a great week!
Elizabeth


These are really great Elizabeth — you're way ahead of me (although I have done two versions of technique #1) :)
ReplyDelete